Showing posts with label Butterick. Show all posts

Friday, February 13, 2015

Red Hot Valentine!

When I last posted... this dress was sketched out, but need to be muslined.

Turned out that those little pleats on the skirt just weren't right for me. The skirt profile was not as flattering as I'd like, so after some advice from sewing friends, I switched it out for a plain flat front skirt, and was so much happier!  The muslin was also a chance for me to audition the sleeve options, and I definitely preferred the pleated band as opposed to the short sleeve, so my plan of action was ready to be executed!


Butterick 6129: Off the shoulder pleated bands.
Butterick 5814: Surplice wrap bodice (front and back, and skirt back).
Butterick 5947: Straight skirt (front only).
  • I wanted the bodice side pleats to extend into the side seam, so I had to add some space into the bodice front pattern piece, and reshape the curve.
  • I used only the skirt back of 5814 so that the back darts would match the bodice back darts.
  • I eliminated the bottom pleat of the arm band, as I felt it was more visually pleasing with 3 pleats instead of 4. I simply folded the extra fabric up into the inside, which finished the inside of the band quite nicely.
The fabric is silk taffeta from Haberman Fabrics, here in Michigan. Love that store!!! Actually, everything (lining, zipper, thread, rigilene boning, horsehair braid) all came from Haberman's. I caught the silk on sale, and while taffeta wasn't my first choice, it's amazing how the underlining changes the drape! I had some red silk organza in the stash for a different project, so I used that to underline the skirt. I wanted more structure in the top for the rigilene, though, so I used some cotton for the bodice underlining.


Getting the proper order of construction together was my greatest challenge, so I just went slow and thought things out before stitching anything down. I placed the rigilene along both side seams, in a line up to the armhole "peak" of the front and also on the back. 2 yards of rigilene was pretty much what I used. I also bought 2 yards of horsehair braid to stitch along the top bodice lining edge for added stability. I used Gertie's blog post about it, and it worked beautifully. The most important thing to do with the Rigilene is to wrap the ends, or the plastic with rub through the lining and scratch you all night. 


 I knew the lining would hide the underlining (striped cotton), so I didn't worry too much about that. If I had to do over again, I would've used the pattern pieces for the lining (darts) rather that making extra layers with side pleats, but with all the other changes I made, it was easier to just stick with what was working.


At this point, I was over the moon. Overjoyed that my vision had (mostly) become a reality, and I was thrilled.


I forgot to photograph the back, sorry! Just an invisible zipper back there anyway! I was really pleased with the how well the inner structure of the bodice behaved, there was no gaping open, it fit my body closely and kept everything concealed (the way it should)!


My fear was that the arm bands would be restricting, but they really weren't, I had no trouble on the dance floor at all! ;)
We had a wonderful time helping to raise money for the Great Lakes Burn Camp and we look forward to attending again next year!

Monday, January 19, 2015

Valentine's Dress

DH and I are going to a dinner dance fundraiser for Valentine's and I'm so excited to make myself something fancy for once!


The Fashionary sketchbook was a Christmas gift this year, and I'm loving it! I can't draw to save my life, but I can connect the dots... each page has 3 silhouettes, very faint and dotted silhouettes and you just have to draw the style lines on the figure! I found it on the Mood website and am so glad to have this new resource in the tool kit! I took it with me to Haberman's this weekend and it was so nice to have a hard copy of my "vision", along with my shopping list of yardage and notions.


The dress is a composite of 3 different Butterick patterns... the skirt from one, the bodice from another and the sleeve from the last. But, it won't be as easy as it sounds since 1) I need to grade the sizing up and 2) I want the bodice pleats to end at the side seam.


The skirt will be the straight skirt from 6019 (the easy part), with the surplice bodice of 5814, but I'd rather have the complete off the shoulder look of 6129 (just can't talk myself into the easy route). Haberman's was having a silk demo and sale Saturday (my birthday!), so I grabbed some classic red silk taffeta to come home with me. If I was more brave, I'd have bought charmeuse, but it's one of those fabrics that I "love the idea of", but working with it frustrates me (even after paying close attention during the demo class)!

I've already traced off the pattern and re-graded for my size (and added 1" length to the bodice), but all those changes make me nervous, even though I'm going to do a muslin and there's nothing to be afraid of. Out came the pattern drafting reference books and I'm quite tempted to just start from scratch.

Since I already have it all traced off and ready to go, I'm going to attempt to "frankenpattern" the bodice first and if it's awful, I'll make my first ever attempt at pattern drafting! Is it weird that I kind of hope it is awful so that I'm forced to take this first step toward gaining a new skill that I've always wanted? I'll keep you posted (sooner than my last post, sorry)!

Saturday, October 4, 2014

In Progress: B6104 (Inspired by Gucci)


Last month McCall Pattern Company was sponsoring a Pinterest contest for Fall/Winter sewing inspiration.  As I was combing the boards for ideas and filling up my own inspiration board, I stumbled across the Gucci Fall/Winter 2014 collection and fell in love...


This coat just took my breath away. The silhouette, high collar, and row of buttons... I was instantly obsessed. It's such a stylish feminine coat... and exactly what I needed for fall. I have a long winter coat, but I really need something of a medium weight and length.


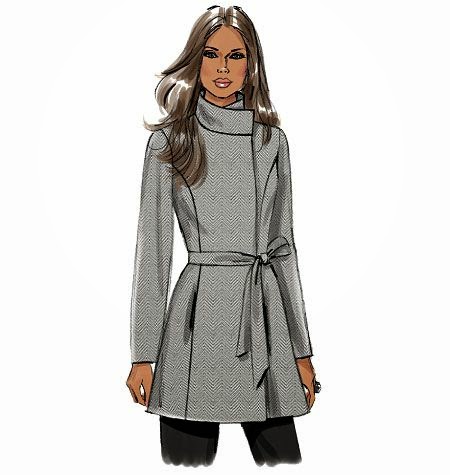
Butterick 6104 grabbed by attention, as it has a similar collar and opening.  The addition of the patch pockets wouldn't be an issue, but how closely did I really want to match the Gucci coat? I love the single row of button extending up, but... wasn't so sure about buttoning all the way to my shoulder. I love the high collar (looks so regal!), but did I want it to fit that closely?


I decided to leave the coat with the Butterick collar and front edge opening, but add the single row of buttons, patch pockets and 1" of length to the top bodice pieces (I always need a little extra length in the waist on the "big 4"). I'm not thrilled about losing the "useful" pockets hidden in the seam, though. Patch pockets aren't very useful, in my opinion, and I know I'll want at least one useful pocket for my keys. Hmm...


Fabric: 2 1/2 yards from The Wool House (Toronto). Oh my goodness, the fine wool fabrics they brought to the Sewing Expo in Novi!!! The owner found me petting a bolt of camel wool, complimented me on my taste and explained that it was $85/yd.  Would I like some? Oh my... too big for my budget! Even after he adjusted the price (since there was only 15 minutes left before the show floor closed for the night), I still couldn't pull the trigger. But, he had this lovely rose/mauve wool at $35/yd, and still discounted it further, so I splurged and bought it.


Buttons: Soutache (Chicago). Maili (the owner) had a small booth just across from The Wool House, and had just what I needed when I showed her the picture of the Gucci coat. It was narrowed down to 2, but the varying metallic tone on this looked so "warm" with the color of the wool... and the emblem on them is very "smart", so it was a sale. Another splurge, at $4/button, but I'm working from a Gucci perspective, so what do you expect?!


When you consider that this dress (similar, but no sleeves) is $1950, then I was able to purchase "my version" at a 95% discount! ;) Look honey, I saved you $1800!!! Geez, when you put it that way... maybe that camel fabric was a deal!

The buttons are only pinned on. They make me happy.
So, here is where I stand... I followed the pattern instructions and used fusible interfacing on just the front bodice piece and the collar. The wool has a lovely drape and I want to keep it a "mid-weight" coat. It went together very quickly and I'm loving the length.

I need to decide on the lining, though. I've got beige silk charmeuse that I bought from Ressy's co-op years ago. I'm wondering if I shouldn't go for a better match, though.  The pattern doesn't include self fabric facings for the lining, so I'm afraid that the beige will peek out from the button placket. I do have about 3/8 yd left, so I could make my own facings, couldn't I? Hmm....


I also picked up this buckle at the Expo from Vogue Fabrics (50 cents!). It's the right color and shape, but I've never made a buckled belt before! Embroider the holes? Use eyelets? I'm afraid they'll fall out. Maybe I should just buy a slide buckle? This part of the process will require more research...

Monday, December 2, 2013

Fantasy to Reality: Cobalt Dress

When my "Cobalt Fantasy" started, I knew that I wanted a cobalt and black sheath dress.  I couldn't be happier with the final result.  Donna Karan cobalt wool gabardine (2 yards, Haberman Fabrics) trimmed with faux leather (Joann's), this sheath is a marriage of two patterns.  Simplicity 1802 (bodice) and Butterick 5566 (skirt).  I wore it today with my black cashmere (vintage pattern) jacket.
I love the back of the bodice, the deep-v back is so feminine, but not too revealing. No special undergarments required!  The skirt (16) and bodice (14) matched up perfectly with no special adjustment to marry the two together at the bottom of the waistband.  To get a neat finish on the sleeve, I lined it and stitched the layers together at the hem right sides together. Then I turned it right side out, understitched along the hem, and pressed it.  When I inserted the sleeve, I treated the sleeve as a single unit, and used my serger to neaten the armhole seam. Not perfect or couture, but it was less of a headache and just as sturdy with a very clean finish.
I cut the faux leather into 1.5" strips, folded them in half wrong sides together, and stitched them wrong sides together. Stitching the piping in place was easy enough, but made me nervous, as the pattern piece edges were diagonal and I didn't want to stretch it out of shape. I topstitched on the blue alongside the "piping" to help flatten and neaten the seams.  Pressing was done very carefully, as the faux leather didn't care for direct heat!
Look at the matching of the seams with that piping! The invisible zipper is hidden along that side seam, too. There's a fair amount of bumps there, but I managed to insert the zipper without drama on the first try! Please pardon the wrinkles and bumps, these pictures were taken after a full day of work!
The piping on the bodice and the skirt is positioned to point downward, but the center front strip faces left and the trim on the waistband points up on the top and down on the bottom. I can't get over how the leather trim really makes this dress look amazing, and I'm so glad that I decided to use it! I cut about 8 vertical strips, so I used less than 1/2 a yard of the faux leather.

All in all, it's a great dress with professional flair and strong design lines.  I'll be able to get continued use out of it come spring, as it's a light to mid-weight wool with short sleeves. Today a student complimented me and asked if I got my dress at Guess or BCBG. I think that equates to a sewing win!