Friday, November 14, 2008

McCall's 5662 - diy style

I'd seen a positive review of this top by Erica B, so I gave it a shot using this knit I purchased through the co-op. If you love the fabric, it's also available for sale at Gorgeous Fabrics.
The print makes it hard to see the details, so here are the features of the top.

1. V-neck overlap
2. Small gathers right and left of center front, both above and below the fitted mid-section.
3. 3/4 kimono sleeves gathered into cuffs.
4. The "V" has good coverage (i.e. no camisole required, in my opinion).


It's comfortable without being dowdy (my dressform isn't doing a great job of selling that point, is she?) and I love that I will be able to wear it with black, brown and white (after Memorial Day, of course!).

The only alteration I made was to take in the mid-section and additional inch on right and left sides, as the fabric was stretching too much. Not only was it too big in the waist, but there was no need for gathers!

This is a close-up of the mid-section, so you can (kind of) see the small gathers left/right, above/below the fitted waistband.

The back is full coverage, no gathers anywhere. Other versions in this pattern have more open backs, and I will definitely use this pattern again in the summer!

I might still shorten it, but need to try it on with skirts and pants before I decide.

Here's my review on PR.


Pleating on the Copper Dress

Reading the instructions that BWOF provides can be a real adjustment for any "visual" person, like myself. It takes me a few read-throughs, then a few more with fabric in hand before I'm ready to stitch, so I thought this visual pleating procedure might be helpful for anyone trying this pattern. Keep in mind that I didn't use a woven like the pattern recommended, so I used fusible interfacing to "lock" the knit in place, then I proceeded with the pleating instructions.

The Burda instructions read:
"...mark 7 lengthwise pleat folds on wrong side of fabric pieces for waist sections. Space first (top) fold 4cm from upper lengthwise edge of fabric piece, then mark 6 more folds, spaced 3 cm apart. There should be 5 cm left at bottom edge of fabric." I have extra space at the bottom because I wanted to work with a larger piece, and trim it down after all the pleating was finished.


"Use a fine needle and fine sewing thread to transfer fold lines to the right fabric side with basting stitches."


"Press all folds (on right side of fabric), except for the top fold, and baste exactly 1 cm from each fold edge with small hand stitches. Press folds down." Here's where I strayed... I can't stand handstitching, so I used my machine. Most of the stitching is hidden, but if I had to do over again, I would've sucked it up, and done the hand-stitching to really make the work invisible. I pressed them all, including the top one.


"Press top fold and lay downward over basting of second fold." I stitched on the wrong side to make this pleat lay flat. Pressing, pressing, and more pressing (especially because this is an interfaced knit) is how I ended up with such a nice, flat result. And, you have to do all these steps twice... once for the front panel and again for the back.


I've gotten some wonderful feedback on this dress, and I don't want anyone to get the wrong impression. I really do like it, and think I need to impose a 24 hour waiting period on posting after completing a garment! It's like when you try a new recipe, and do all the preparation and cooking, that by the time your ready to eat, you're tired of looking at it and smelling it, and you're mind plays a little trick on you. "Is it good, or do I just think it's good because I went to all that work making it?" Maybe not... maybe I just hate to cook!

Monday, November 10, 2008

BWOF Dress & McCalls Jacket


I've finished the dress and jacket I'll be wearing to my nephew's wedding next weekend. I'm happy with the outcome... not thrilled, but happy. Why not thrilled? I should've adjusted the hem of the jacket to account for removing the ruffle, and while I like the front of the dress, I'm not crazy about the back and I can't get the hem to lay flat. It's times like this when I wonder... maybe I should've just gone shopping instead. When I came out to model it for the fam, DH said "I don't like the jacket" and little Miss D echoed, "Me neither, Mom." Well, gee... thanks. Love you, too...

Anyhow, the dress came together well. It's BWOF 09/2008 #132. The instructions were good, the pleating was a PAIN IN THE BUTT. Next time I post, I'll show you details, but for now I'll just say it was time consuming. Part of the problem was that the pattern called for satin for that mid-section, but I couldn't find any to match the copper silk jersey I'd already purchased. So, I used fusible interfacing and pleated the knit as if it were a woven. It's a perfect match, but a tad on the bulky side. I really like the center front and center back gathers, I little place to hide some baggage without the maternity look.
Want a good laugh? Can you believe the bodice was supposed to be split all the way to the pleated band? Are you crazy? Heeeeeeelllllllll no. Stitched that sucker up, pretty darn quick.

I also shortened the dress to knee length, and used a knit swimwear lining under the skirt, but used the left-over silk jersey for the bodice lining. Oh, and I skipped the zipper. Yes, you read that correctly, I skipped the zipper. When I realized that the knit midsection allowed me to slip into the dress without opening the side seam, I got really lazy, really fast. And I will admit, the thought of putting a zipper into all those pleats made me a little nervous (all that matching and all that bulk).
The jacket was the bolero version minus the ruffle. In my previous post, I got some fabulous feedback and decided to keep it simple and let the fabric do the talking. Well, I should've extended the hem to produce a little more coverage, I feel like the jacket is pretty much 2 sleeves and a back! It will serve it's purpose of covering my arms during the 40 degree day, and will probably be shed when the dance floor opens at the reception! I lined the bolero with some copper dupioni. I like to think I'll wear the bolero with other things, but all I can hear in my head is Chris Farley in "Tommy Boy" singing, "Big guy in a little jacket"... I really need to step away from the Halloween candy.

Anyhow, that's my story and I'm sticking to it. Once I've purchased the proper footwear, apply makeup and curl my hair, I'll share pics that don't intentionally chop my head off. Promise...

Tuesday, November 4, 2008

I Need Your Advice...


My nephew's wedding is next weekend, and I'm having some issues with my outfit!


My dress is underway, so that's not the issue. I'm making BWOF Sept. 2008 Dress 132, and I'm using a gorgeous copper silk jersey. I love this fabric, it's so soft and silky, but I have to admit... If chiffon is like sewing on air, then silk jersey is like sewing with water! I shortened the dress to knee length, and fell in love with the color when I saw it everywhere this fall!


Anyhow, the weather here in Michigan is unpredictable, and I've bought fabric to make a jacket to wear with the dress. This fabulous hand-painted silk dupioni (both fabrics came from Haberman's Fabrics in Royal Oak, Mi purchased at the American Sewing Expo this year!) is a perfect match, but I'm not quite sure what style jacket to make.


Option 1. A Bolero using McCall's 3033. I like style C.


Concerns: Will the edge ruffle compete with the pleated waistband on the dress? And, I'd like to be able to wear this with more than this dress (dress pants or jeans), do you think it would work?

Option 2: Use a different jacket/shrug pattern. I have 2 yards of 54" wide silk, and my body style (pear) combined with this gathers on this dress make me think I need to choose a shorter style that will end at the waist or above. FYI: the skirt joins the pleated waistband at the waist. Maybe a Chanel style neckline (no lapel) with a shorter hem and sleeve length?

Option 3: Forget the painted silk, and use a black suiting from the stash to make a jacket.

Keep in mind I have 10 days to get these pieces done! The dress is going well, so I'm not too worried about that. I should be ready for the jacket by this weekend.


Any and all ideas are welcome... please help me decide the right style to complement the dress and the fabric!

Saturday, October 18, 2008

The Fabric Co-op

I first found out about Fabrics and Notions from the discussion board at Threads Magazine.
Basically, a few ladies work together out of the basement of one of their homes to organize photographing, posting, selling and shipping fabrics and notions. They are located near a mill that produces very high quality fabrics, many from designers like Liz Claiborne. Dawn has posted about the quality of the goods, too, and yes... It's all my fault, I dragged her into their hands, too!!! Click here to see her post.

I've found the same fabrics on other websites for a lot more money, which makes me feel great about the quaility and the savings I'm getting, but there are a few drawbacks.

1. They only ship once every other month, so you can't be in a hurry. They are seasonal (at the end of summer wools and coatings were posted), so even though my order was placed a month ago, it will still arrive in time for me to make and use the garments.

2. You don't always get what you order. Sometimes they have a limited amount available and sometimes enough has to be ordered to fill a bolt. In the case of needing to meet minimum, they have posted the status and asked ladies to change they're color or add to their order to get the fabric for the group. I've missed out on a few fabrics, but also ended up getting one by other ladies filling the bolt (Yay!).

3. There are times of chaos and disorganization, but keep in mind that these ladies are passing the discount on to us, and get no pay for their work. So, you must be patient, this doesn't operate like a fabric store. There is give and take when quality fabrics are sold at reasonable prices!

My experience overall has been a very good one. There's this dress, and this dress, and this skirt. The quality is good, the photos pretty accurate color, and customer service is good also.

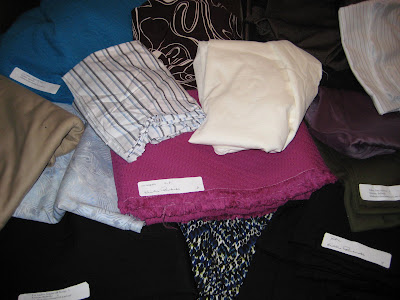
A huge array of fabrics are posted each month of many types (velvets, denims, cottons, silks, coatings, flannels, childrens) so beware, you'll love a lot and spend a lot! I didn't realize how quickly my "few yards here, few yards there" added up! Right now, I'm on a fabric diet, and have refused to open the picture files to see the new fabrics ("out of sight, out of mind") or buy anymore for the time being. (Did you see the picture at the top???) I do check in to read what's offered, just in case something special comes through. They also do notions buys from time to time (needles, zippers, elastic) but I haven't done anything with that (Search FabricsandNotions2 at Yahoogroups).


The Joining and Buying Process

1. Go to http://www.yahoogroups.com/ and register or sign in if you're already a member. Here's the link: http://groups.yahoo.com/group/FabricsAndNotions/

2. Post and request to join the group, and then post an introduction message to get "unmoderated" and receive all the messages.

**This is where you have to decide what messaging works best for you. I get a digest, which is messages in batches of 25. There are hundreds of members, and everytime they post, a new email is made, so you're mailbox can fill up in minutes. Or, you can just check into the Yahoo Groups page and read the messages there on your own time.

3. Ressy is in charge, and known as the Evil Fabric Queen (why? because when she waves her magic wand, watch out! You'll fall under her spell and feel the need to buy lots and lots of fabric!). When she posts "New Fabrics" there will be a link to a photo album where you can see pictures and descriptions of the fabrics and their prices. These aren't usually bargain basement prices, so this isn't really a money saver in that respect. But you will see great fabrics at lower prices than other online fabric stores. Occasionally, she'll get a great deal on something (muslin was a recent one), and it will be a super awesome price, but you have to act fast. Again, there are hundreds of members across the country.

4. When you see something you want, you open the database for that fabric at the main Yahoo Group page, and add your record of which fabric and how much you want. Time is limited, though, usually a few days or a week, then it's done and closed.

5. When that sale closes, Ressy will remind everyone to check their records.

6. Payment can be done by snail mail or Paypal. Include a little extra for shipping.

7. When it's time for a shipping, another message will be sent for you to verify your order and payments. This is where you may find out that you didn't get a fabric you ordered. In that case, you'll have a credit on file, and can apply it to another future purchase. If you're paid up, then your fabric will arrive a few days later, with each one labeled by name and yardage.

If you get stumped, you can either email me or post to the Yahoo group, and you'll get fast help! Becky and Liz are Ressy's helpers, and they are great!
Now, if you'll excuse me, I have a large pile of fabric to make into jackets, shirts, dresses, pants...

Saturday, October 11, 2008

The Homecoming Dress

This department store dress was brought to me to recreate in purple. The client liked the design style and fit, but not the color. I've never copied RTW before, but felt confident that by using a combination of patterns and my own skills, I could complete the project in the 3 weeks provided.

McCalls 5623 was used for the bodice, which was nice because it offers fitting options for different cup sizes. The RTW dress was a size 4 and the cup was too big, so I was very glad to be able to accomodate her in that area! The RTW dress also had a bias cut underskirt, so I used McCalls 5100 for that part, with modifications. I needed a flat upper skirt edge, and extended it the required amount to obtain the necessary length from waist to bust. I also used the muslin to determine the correct size to cut. As for the chiffon overskirt, with only gathering in the CF and CB, I used 1.5 yards of 60" wide chiffon, and drafted that part myself.

The bodice was constructed first, basting the lace pieces to the underlying satin, then stitching the bodice together. An additional bodice of just satin was made for the lining. Because the top edge would be wrapped in satin (I thought the RTW top edge was piping, but it wasn't), I basted the two bodices wrong sides together.

The bias skirt was then constructed of satin, but CB seam left open for the invisible zipper. I stabilized the CB skirt edges with 1" wide fusible interfacing to prevent stretching with zipper placement. The chiffon overskirt was measured and CF and sides marked, pinned, and gathered at CF and CB. The bodice and skirt layers were then attached to complete the dress body.
The bow and sash were made of bias cut strips (3.25" wide), folding in half, stitched at 5/8", turned right side out and pressed to produce a 1" finished width. The band was hand sewn over the bodice/skirt seam. The bow was hand sewn into place and tacked down to stay open. I then installed the invisible zipper and closed the CB skirt seams separately, so the chiffon was still flow fully.
I used a narrow hem to complete the CB chiffon seam. The top bodice edge seam was then finished with a strip of bias cut satin, but here is where I would've changed a couple of things. I should've made the trim more narrow to better match the RTW dress, and attached the straps at this point. Not a big deal, though...


To add the sparkles, I used the BeJeweler Stone Styler and heat fix Swarovski Crystals from Sue's Sparklers. I placed the crystals randomly, but evenly spaced apart all over the lace bodice. Super easy, and adds a professional flair, the task was tedious, but completely worth it.
A hem, hook & eye to finish the job.

All fabrics were purchased at JoAnn's.

My client is very, very happy, as am I. This project was scary at first, as it was my first attempt at copying RTW, it had been a long time since I worked with these fabrics, and this dress was for the daughter of a coworker. Not only did it turn out great, it's bringing in more business, so it's a win-win for me.

*Yes, I know there's no view of the back... yet. This dress was too tiny to zip completely on my dress form, so when I get pics of The Girl in The Dress, I will update this post!

Coming Soon: Halloween Costumes and a Silk Jersey BWOF dress for a November family wedding!

Monday, October 6, 2008

No, I haven't fallen of the face of the Earth!

Here's a little peek of my progress with the Macy's Homecoming dress...
If you missed the earlier post, I've been contracted to copy a dress for the 9th grade daughter of a colleague. The original was exactly what they wanted in style, fit, and design, but was not the most pleasing shade of green. So, I'm recreating it in dusty purple. This is my first attempt at copying RTW, and it's been 15 years since I did formal wear. I'm using 2 different McCalls patterns, one for the bodice, and the other for the underskirt (bias cut), and self-drafted the chiffon over skirt.
Still to do: install the invisible zipper, finish upper bodice edge (bias cut satin of underskirt), heat fix Swarovski crystals to the lace bodice, make and attach spaghetti straps, and hem.
I'm just buried alive under the papers to grade (did I mention 35 students x 5 classes each day), the almost finished dress, and the Fire Department Embroidery order (13 knit caps and 5 sweatshirts). Oh yeah, don't forget the doggie sweatshirt Halloween costume and the witch Halloween costume (thank God I have 3 more weeks). I have Parent Teacher conferences tomorrow after school, the Homecoming dress must be done for the dance this Saturday...

Ever wish you had the super hero ability to stop time, but keep moving forward yourself????

Anyhow, I miss you all (school computers have now blocked all blog sites, so no peeking at work anymore), and will post lots of pics in the coming days of both the green original dress and my finished product, inside and out! Keep your fingers crossed for me, I need all the prayers I can get!