Thursday, October 17, 2013

Long Overdue Jacket!

I've been finished with this jacket for a couple of weeks, but haven't had a chance to blog, photograph, or wear it (it's been a warm October in Michigan until now).  But, today was the day!  I thought it would be fun to hold my "photo shoot" in my classroom, with the assistance of a couple senior girls that were happy to take a few minutes to help!  When you also consider that I've had plans to make this jacket for 4 years, that really makes this "Long Overdue"!
AP Statistics... both fashionable and interesting!
Pattern Description:Simplicity 2284
Misses' & Miss petite lined jacket in two lengths with trim variations… separate patterns included for A, B, C, D cup sizes. American Sewing Guild. I used view D (skipped the zipper closure), but switched to a 3/4 sleeve. I wish I had paid closer attention and used the sleeve with the button placket, though. I'll use it on my next version for sure, although the buttons clicking on the desk top when I'm writing might bug me.  Here's the back view... I hate that I didn't think to match the plaid. Ugh!

Pattern Sizing: As stated above, there is sizing for cups A, B, C, and D, which is nice. I cut the size 14 according to the finished garment measurements, and with a small adjustment in the waist, it's spot on.

Fabrics and Trim Used:
-2 yards of tweed purchased in New York (4 years ago) from Paron Fabrics.
-2 yards of silver silk charmeuse from Gorgeous Fabrics.
-4 yards of trim (black with tiny bead and metal chains) from Joann Fabrics
-2 buttons from Etsy. I have many more, as I was going to use them along the center front. Undecided on that...
It was well received by all ages today! Lots of girls were asking if I made it, and one told me that it looked like it came from "White House, Black Market". I'll take that as a compliment! It was so comfortable to wear, and the weight is just right for not being too warm.  Here's a peek at the silky lining inside.
Overall, I'm loving the way it turned out and will decide whether or not more silver buttons on the front will be a good addition. The fringe was not too hard to do at all (1" wide, bias cut strips), and really gives it the RTW look I was after. I know it's not the "couture" jacket that Susan Khalje taught me how to make, but I'm ok with that. No one in my circles knows any differently! In all honesty, I like this one better than my old one! I have the fabric and lining for my next version, and then I will be giving this pattern a rest, for along time!

On the table is a different jacket nearing the finish line, and I'm really excited about it! Leather + Sweater Knit + Metal = Awesome. Give me another week to ten days, and I'll have that posted here, too!

Wednesday, October 2, 2013

Project Plan: Leather/Knit Jacket

Awhile back I was gifted some wonderful leather deer hides from my sister. Her husband, an avid hunter, had planned on collecting enough to have his own jacket made, but changed his mind.  Lucky me, I was given a LARGE amount of FREE leather!
 
I've been thinking of making a leather/knit combo pullover, so at the Novi Expo I found the perfect knit to coordinate with the ivory/buff leather!  This was 1 of 3 fabrics I rewarded myself with for finishing the Passion for Fashion challenge!
 
I bought the McCalls 6614 pattern a few weeks ago with this plan, but as I dug for it last night, stumbled across this Vogue 8932 pattern that I bought at the same time.  Hmmm....

  I only bought a single yard of the sweater knit, since I was planning on a pullover.  I figured that was all that I would need for center front & back. I *love* the jacket pattern, and the style lines are perfect for leather.  It's the jacket pattern that I keep reaching for and drooling over, so my heart is strongly leaning that way. Like, 98% leaning that way!

So, I think I'll be cutting the pattern and making muslin this weekend to perfect the fit and help me decide what parts to cut out of the leather and what parts should be knit.  Knit sleeves for certain, and with all the seams on the back, I have more options for inserts, if I have enough fabric.  And if not... Haberman's is only a phone call and 45 minutes away! 
 
And one last apology for the "disappearing-reappearing comment box" issue. I think I've finally resolved in by reverting back to my old background and template! I'll admit it... I love the comments and feedback from all of you, and miss your voices terribly!

Sunday, September 29, 2013

Passion for Fashion 2013 (Picture Heavy)


American Sewing Expo, Novi Michigan...
8am Friday morning the challenge was issued: 

Posters to choose from: Lady Gaga, Michael Jackson, Woodstock, The Beatles, Ziggy Stardust, Bob Marley, Blondie, Nicki Minaj, Jimi Hendrix, Grateful Dead, Elvis, Saturday Night Fever, and Kiss.
I was the 4th to choose, and immediately knew that I wanted Saturday Night Fever.
When I was about 5 or 6, I used to listen to my brother's 8-track of the soundtrack and would dance, dance, dance. The poster and theme of the challenge meant that I could make a flowy, fun dance dress that sparkles, so I was super excited!

Budget: $100
Rules: All supplies (fabrics, trims, embellishments) have to be purchased at the expo. No patterns from home, but some basic patterns may be provided, and you may bring a pattern drafting book.
Deadline: 3pm Saturday (16 hours)
1st place Prize: Baby Lock "Symphony" sewing machine (2nd and 3rd places won different Baby Lock models).
Haberman Fabrics and Vogue Fabrics were the only fabric vendors at the show, and Habermans brought the most amazing "rock and roll" fabrics for the challenge. I immediately eyed a silver/gold ombre knit ($20/yd) and a black "brocade" knit ($10/yd). I also used a small amount of black stretch mesh for part of the bodice ($10/yd).

The silver/gold ombre knit looked like a tissue lame, but had the most wonderful drape with the perfect weight for my dress.  There were a number of patterns provided (to use, but not make exactly), and I grabbed Vogue 8882 (view E) and McCalls 6741 to create my look. I left the waistband off the skirt, used just the bodice of the dress, and altered the neckline to create a sheer halter piece.

With the limited budget, I couldn't do the entire dress in the ombre, nor did I want to. I chose to use the ombre on the sides, with the darker print in the center front and back.  Since the design had to be "fashion forward" (something currently fashionable, not 70s costume), I decided to not made a dress, but separate the two pieces with a bare midriff.  I used Selena Gomez as my inspiration of a current music artist that could be wearing this look. I made up a story about her remixing the greatest hits of the 70s and that she wanted this look to help promote the upcoming release of her album. As silly as it might sound, it really did help me focus on the right design details to keep it current.
After working from 8am until 7pm, I was able to walk away from "Day 1" with my skirt done, and most of my bodice done.  I still needed to tackle the stretch mesh and the embellishment. 
"Day 2" was a shorter and busier day, with sewing from 8am until 3pm, then hair & makeup for the models, judging, photography, and the runway show at 6pm.  Just a little crazy, no big deal...

We were provided with wonderful professional dress forms, with made the process of designing the bodice lines and halter so much easier. Having never worked with stretch mesh before, it was rather stressful, but with time ticking, you have no other choice but to just dive in!

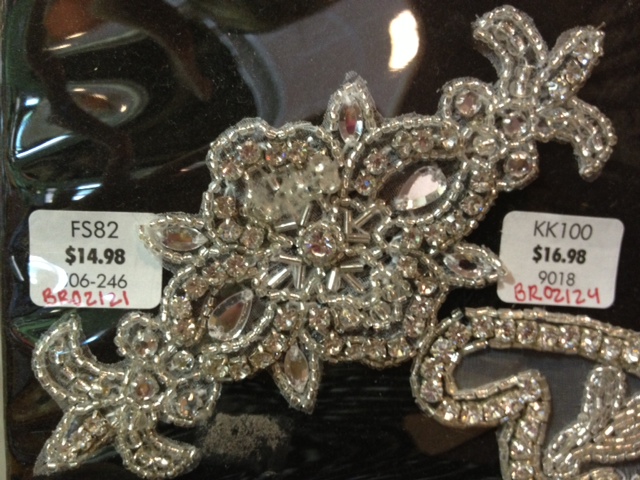
As much as my dress sparkled, I needed it to stand out in a "big way" according to the challenge, so I went on the search for "bling".  I wanted big bling, and lucked out with a vendor selling lots of different sparkles and trims.
I removed all the stones from the backing, and re-applied them to the mesh halter in a random placement.  Our mentor described it as a "shattered disco ball" look, and I loved it.  I used a glue stick to hold them temporarily while I stitched them all in place.  It was about 2 hours of hand-sewing and the most arduous task of the design.

At 1:30 Saturday afternoon, I stepped away from the dress form thrilled with the final product and excited to see it on my model!
I couldn't be happier with the way it all turned out, it fits her well and fits the theme of the challenge, and is such a fun dress to wear and watch move down the runway.  I placed in the top 6 (woo hoo!!!), but feel like I really came away a true winner. There is no disappointment in my heart, nor regret about any of my design choices.  I've accomplished a task that I've had on my "sewing bucket list" for 6 years, and proved to myself that I possess skills that put me in the same group as degreed design students and phenomenal sewing veterans.  I've always said, "No, I'm not a designer," because I can't draft a pattern or sketch my vision, but this competition has left me feeling very proud, happy, and fortunate.  Proud of myself for taking a risk, happy with the resulting dress and compliments I received, and fortunate for being part of a wonderful community of sewing friends. Rhonda Buss was also competing and made the most AMAZING rock and roll bad-ass leather look that would make KISS proud. Job well done, Rhonda! I had a wonderful Friday night with 5 super awesome "internet sewing friends" filled with laughter and sewing talk.  I met and chatted with other sweet ladies that read this blog, and are now counted among my widening circle of "internet sewing friends" that are quickly becoming "real life friends".

I wish I had more pictures of all the other looks made my the other 11 designers, but I'll be honest... I was really just focused on my design. Here are a few from the runway show...
"Nicki Minaj"


"Blondie"


"KISS" (3rd Place)

"Jimi Hendrix" (2nd Place)


"The Beatles"

"Elvis" (1st Place)
3 yards of metallic ombre: $60
2 yards of metallic brocade: $20
1/2 yard of stretch mesh: $5
2 yards of black elastic: $2
2 sets of large beveled crystals: $10
1 yard of gold trim (model's hair): $2
Total Spent: $99 (and change)
Having an amazing sewing/designing experience: PRICELESS

*The local news came out and spend most of Friday with us, and aired a short story about the challenge in the early evening. Here's the link to the video, if you're interested.

Monday, September 9, 2013

Hurricane Kristine

While I'm waiting for the bridal appliques to arrive, I whipped up a cute A-line dress for myself with Simplicity 1651
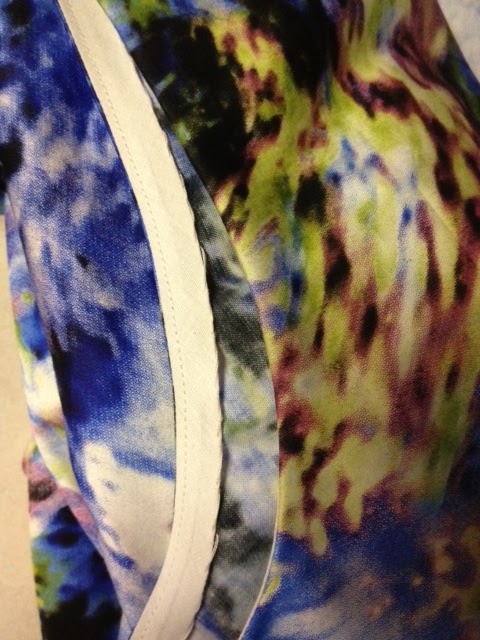
 I used bodice B with the flared skirt.  I had 2 yards of the this lovely cotton sateen print from Haberman Fabrics. It appears to be a digital print, and when I saw it all I could think of was Monet.  A friend told me that it reminds her of a hurricane map. Hurricane Kristine, it is!
It has such beautiful shades of blue, purple and green. All I know is that it's very unique and once I saw it, I knew it had to come home with me. This purchase was made just prior to the fabric diet, by the way!

The pattern was great to work with. The instructions were good and the lines are lovely. One of these days I will remember to lengthen the bodice an inch. I swear, I know I should, and then before I know it, the fabric is cut, and I'm like, "Oops. I forgot. Again!?"  I used bias tape to finish the armholes, hand stitched it very discretely inside so the stitches wouldn't show through.
The peek-a-boo hole in the front was a little too "revealing" for me to be comfortable at work... It may not look like it in this pic below, but from a different angle (taller student, or me leaning over), it was pretty open.
So, I used a scrap of left over, and carefully "patched" the hole, and I think it's good. I don't think anyone looked at me today and thought, "Oh, that's supposed to be open."
 
I put this together pretty quickly, and I just love the fabric. It was so comfortable today, and I think it has a very flattering silhouette. I don't know if I'll make it again for myself, as the bodice is pretty unique, but I would love it in a solid with 3/4 sleeves!

UPDATE: The Chanel jacket is nearly finished! I just need to add the trim to the sleeves. So excited to finally wear one of my NYC fabrics... but, tomorrow's heat index is 104. Seriously. Michigan in September. Unreal.

Friday, August 30, 2013

Bridal Bling

Where does one find beaded bridal appliques?
The wedding dress applique I'm trying to match.
Well, I started at Haberman Fabrics, my favorite (kind of) local fabric store with the most amazing bridal fabric boutique you've ever seen.

So, they had a number of appliques for sale...


None of which were a "match" for the appliques on the dress itself. Not a problem. I had a few other options...

I could remove the existing appliques, placing new ones in their spots and adding more new ones like the bride wanted. At $12-$15 per applique, that's just under $200 and all the bling would match!

Or... Haberman's had the most amazing lace with these metallic floral motifs. I *could* use glue or heat and bling them up myself, and create my own appliques. I like this because this lace was a very close match to the existing appliques, but... it would take me a long time to bling up 6 motifs, cut them out and then attach them. I've got the heat-fixing tool for the job, and can order crystals and pearls online.

Haberman's also had some gorgeous trims that I could cut apart to create appliques. Again, no exact match, but some really beautiful possibilities!

I searched the internet for more appliques, and found a few, but nothing that came very close.
Lace & Co. $40 for the pair

Shine Trim, $25 each

I've given the bride all of this information to consider, and we'll see what she comes up with. In my professional opinion, I think it would be best to remove the existing appliques (there are only 6), purchase a dozen new ones, and attach them over the old spaces and fill in the empty spots.

If any of you have thoughts on resources I haven't considered, please leave a comment!